Overview
Intuned allows you to develop your projects in Hosted projects using the online IDE, or locally as Connected projects using the local CLI. This guide focuses on Hosted projects and the online IDE. You should use the online IDE when:- You want zero setup—just open your browser and start coding.
- You want embedded AI assistance to build and edit automations.
- You want Selector Agent to generate selectors from the live page.
- You need platform-native workflows like AuthSessions and browser-based debugging.
- You’re working solo on smaller projects.
Create a project
To create a project that runs in the Online IDE:- Go to app.intuned.io/projects
- Select Create Project
- Choose your language (TypeScript or Python)
- Select a template or start from scratch
- Name your project
- Ensure “Hosted project” is selected as the project type (not Connected project)
- Select Create and Open
Online IDE interface overview
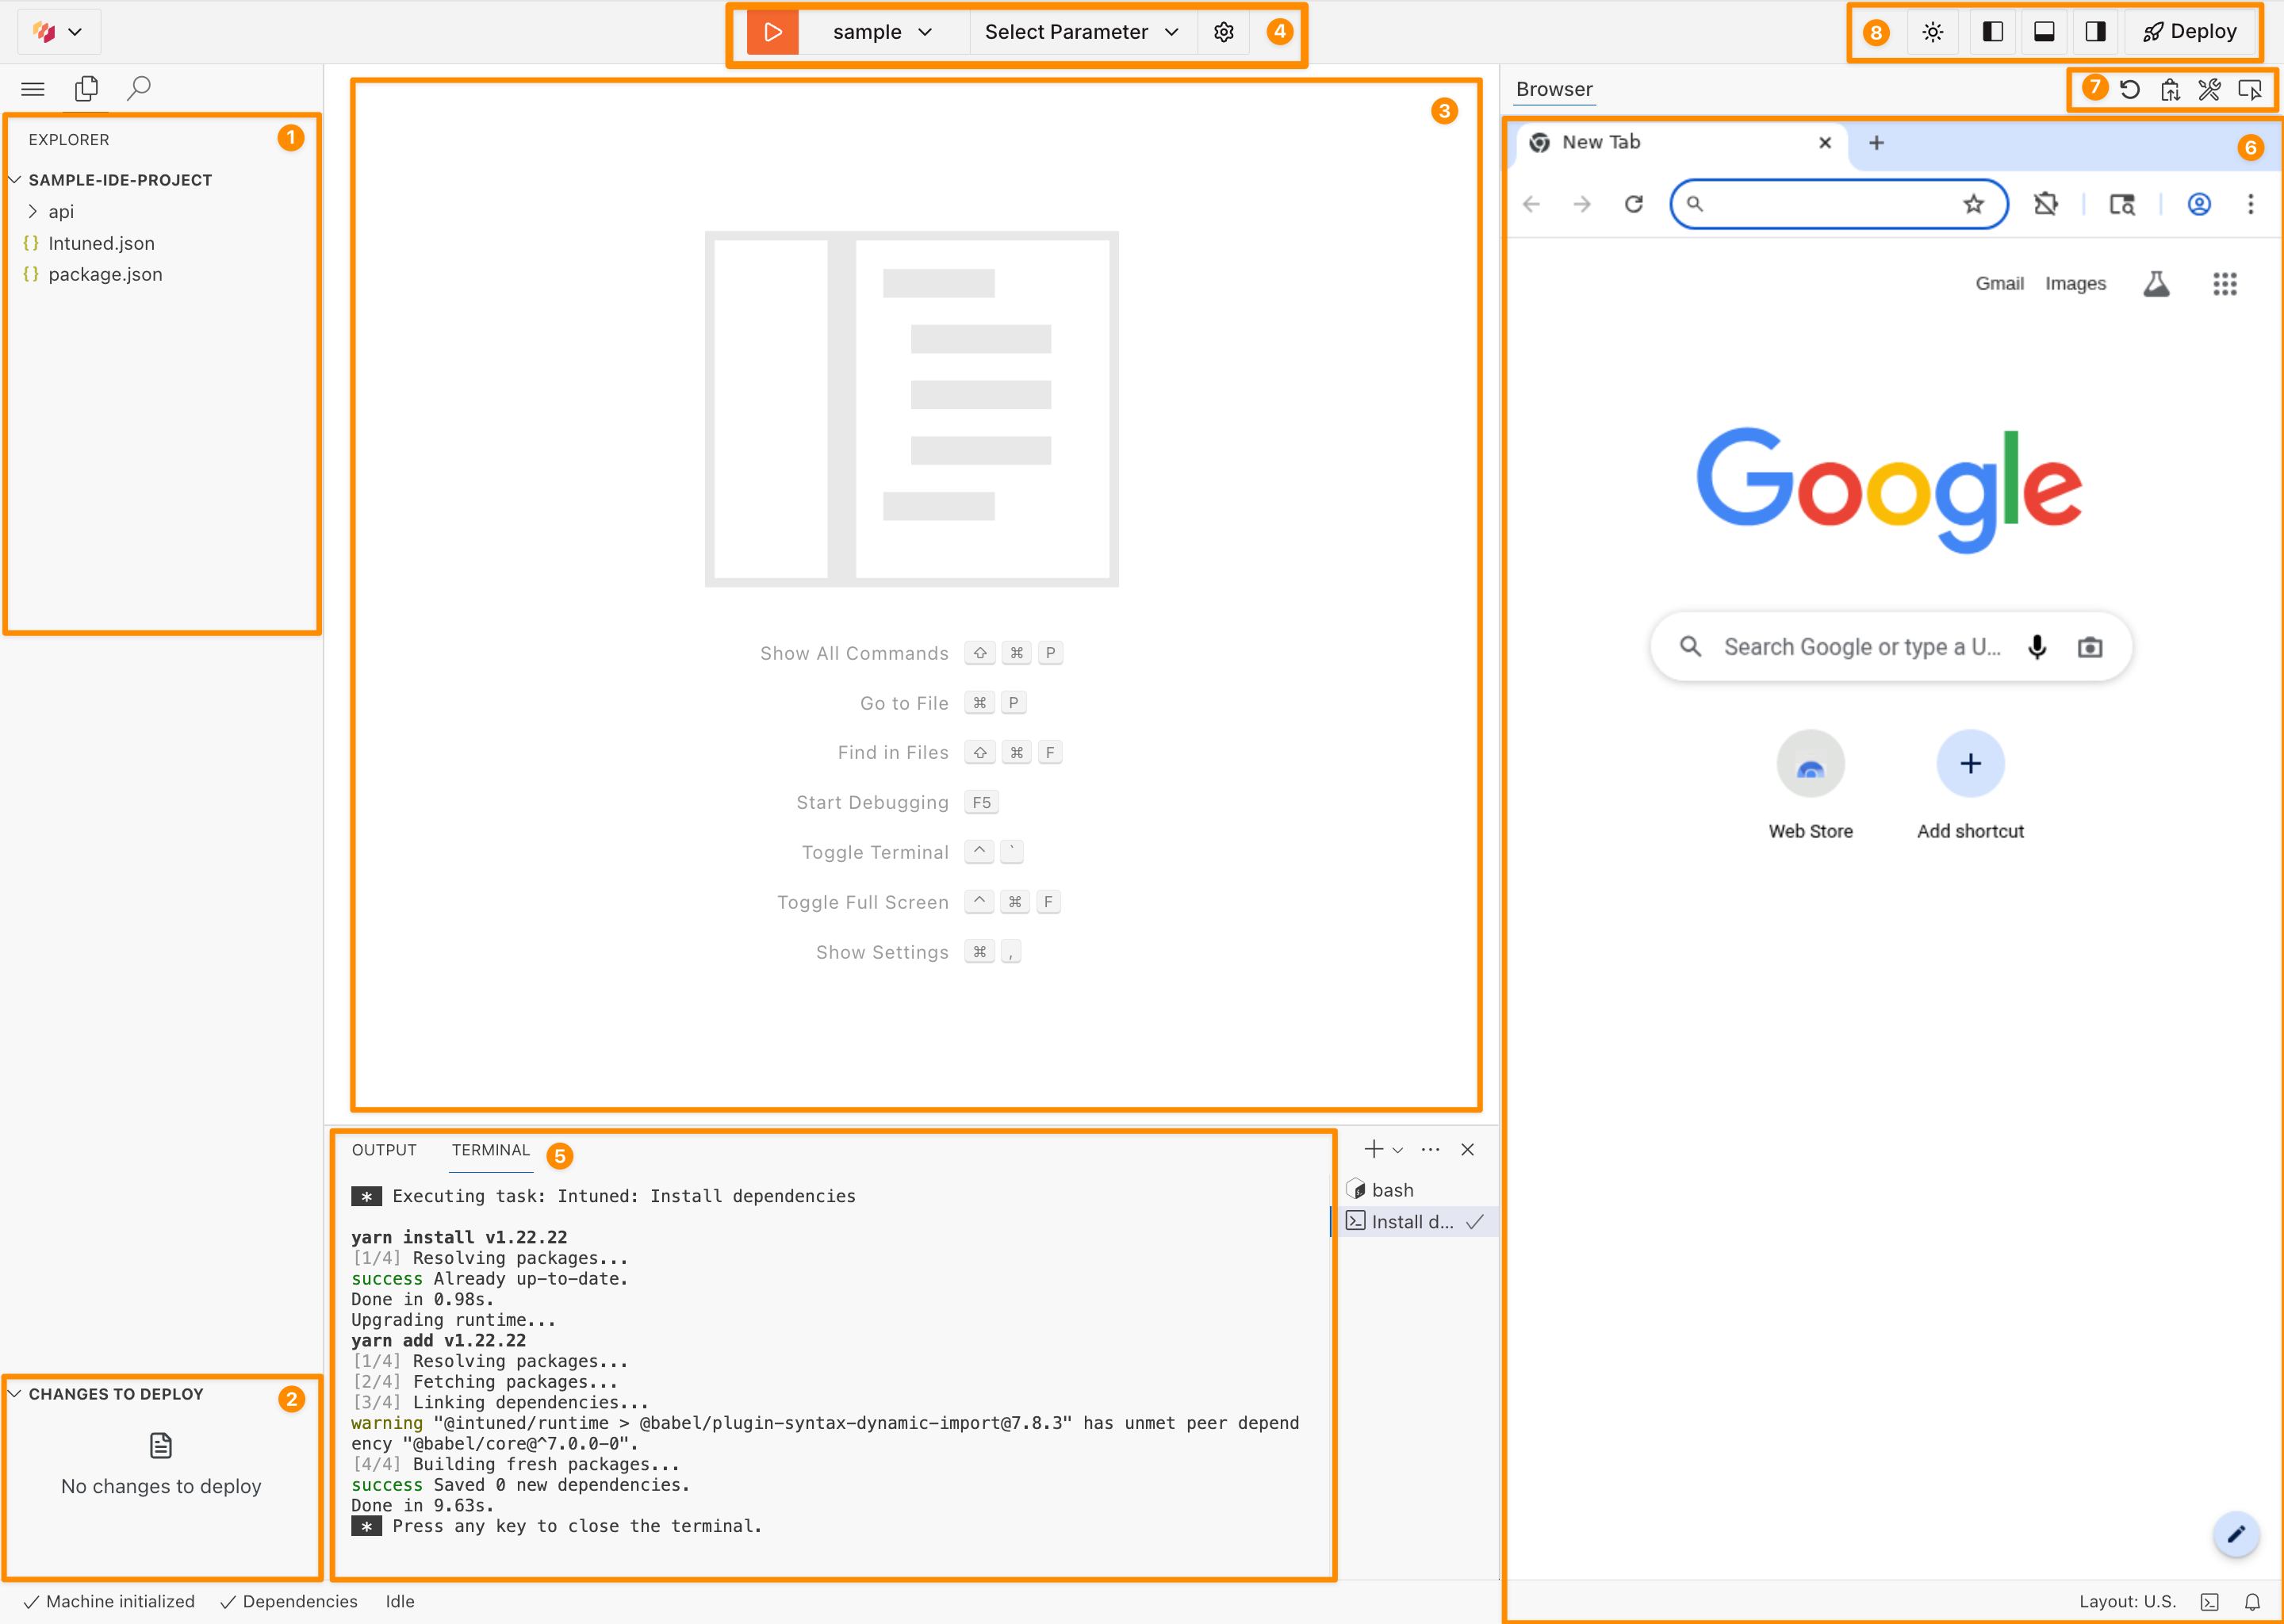
1. File Explorer (Top Left Sidebar)
The file explorer displays your project’s folder structure:2. Changes to deploy (Bottom Left Sidebar)
Shows changes that will be included in your next deployment.3. Code Editor (center panel)
A VS Code-based editor with syntax highlighting, IntelliSense, familiar keyboard shortcuts, embedded AI assistance for project edits, and inline code suggestions.4. Run Controls (Top Center Toolbar)
Select an API, configure parameters, and start execution with the Play button.5. Terminal (Bottom panel)
Displays execution logs, traces, and output from your automation runs:- OUTPUT tab - Shows VS Code extension logs and messages
- TERMINAL tab - Shows command output such as
yarn installorintuned run api
You can’t use the terminal to run arbitrary commands. It only displays output
from IDE-executed commands.
6. Browser Panel (Right Panel)
A live browser view that shows your automation executing in real-time. Watch exactly what your code does and debug UI issues immediately.7. Browser Controls (Above Browser Panel)
- Restart Browser - Restarts the browser instance
- Clipboard - Copy text from the browser to your local clipboard
- DevTools - Opens browser dev tools for debugging
- Selector Agent - Generates selectors for elements using the live page context
8. View Controls + Deploy Button (Top Right Toolbar)
- Toggle Sidebar - Show/hide the left sidebar
- Toggle Terminal - Show/hide the bottom terminal panel
- Toggle Browser Panel - Show/hide the right browser panel
- Theme selector - Switch between light, dark, and system themes
- Deploy - Triggers project deployment
AI in the online IDE
Hosted projects include embedded AI assistance in the online IDE for building and maintaining automations without leaving the editor.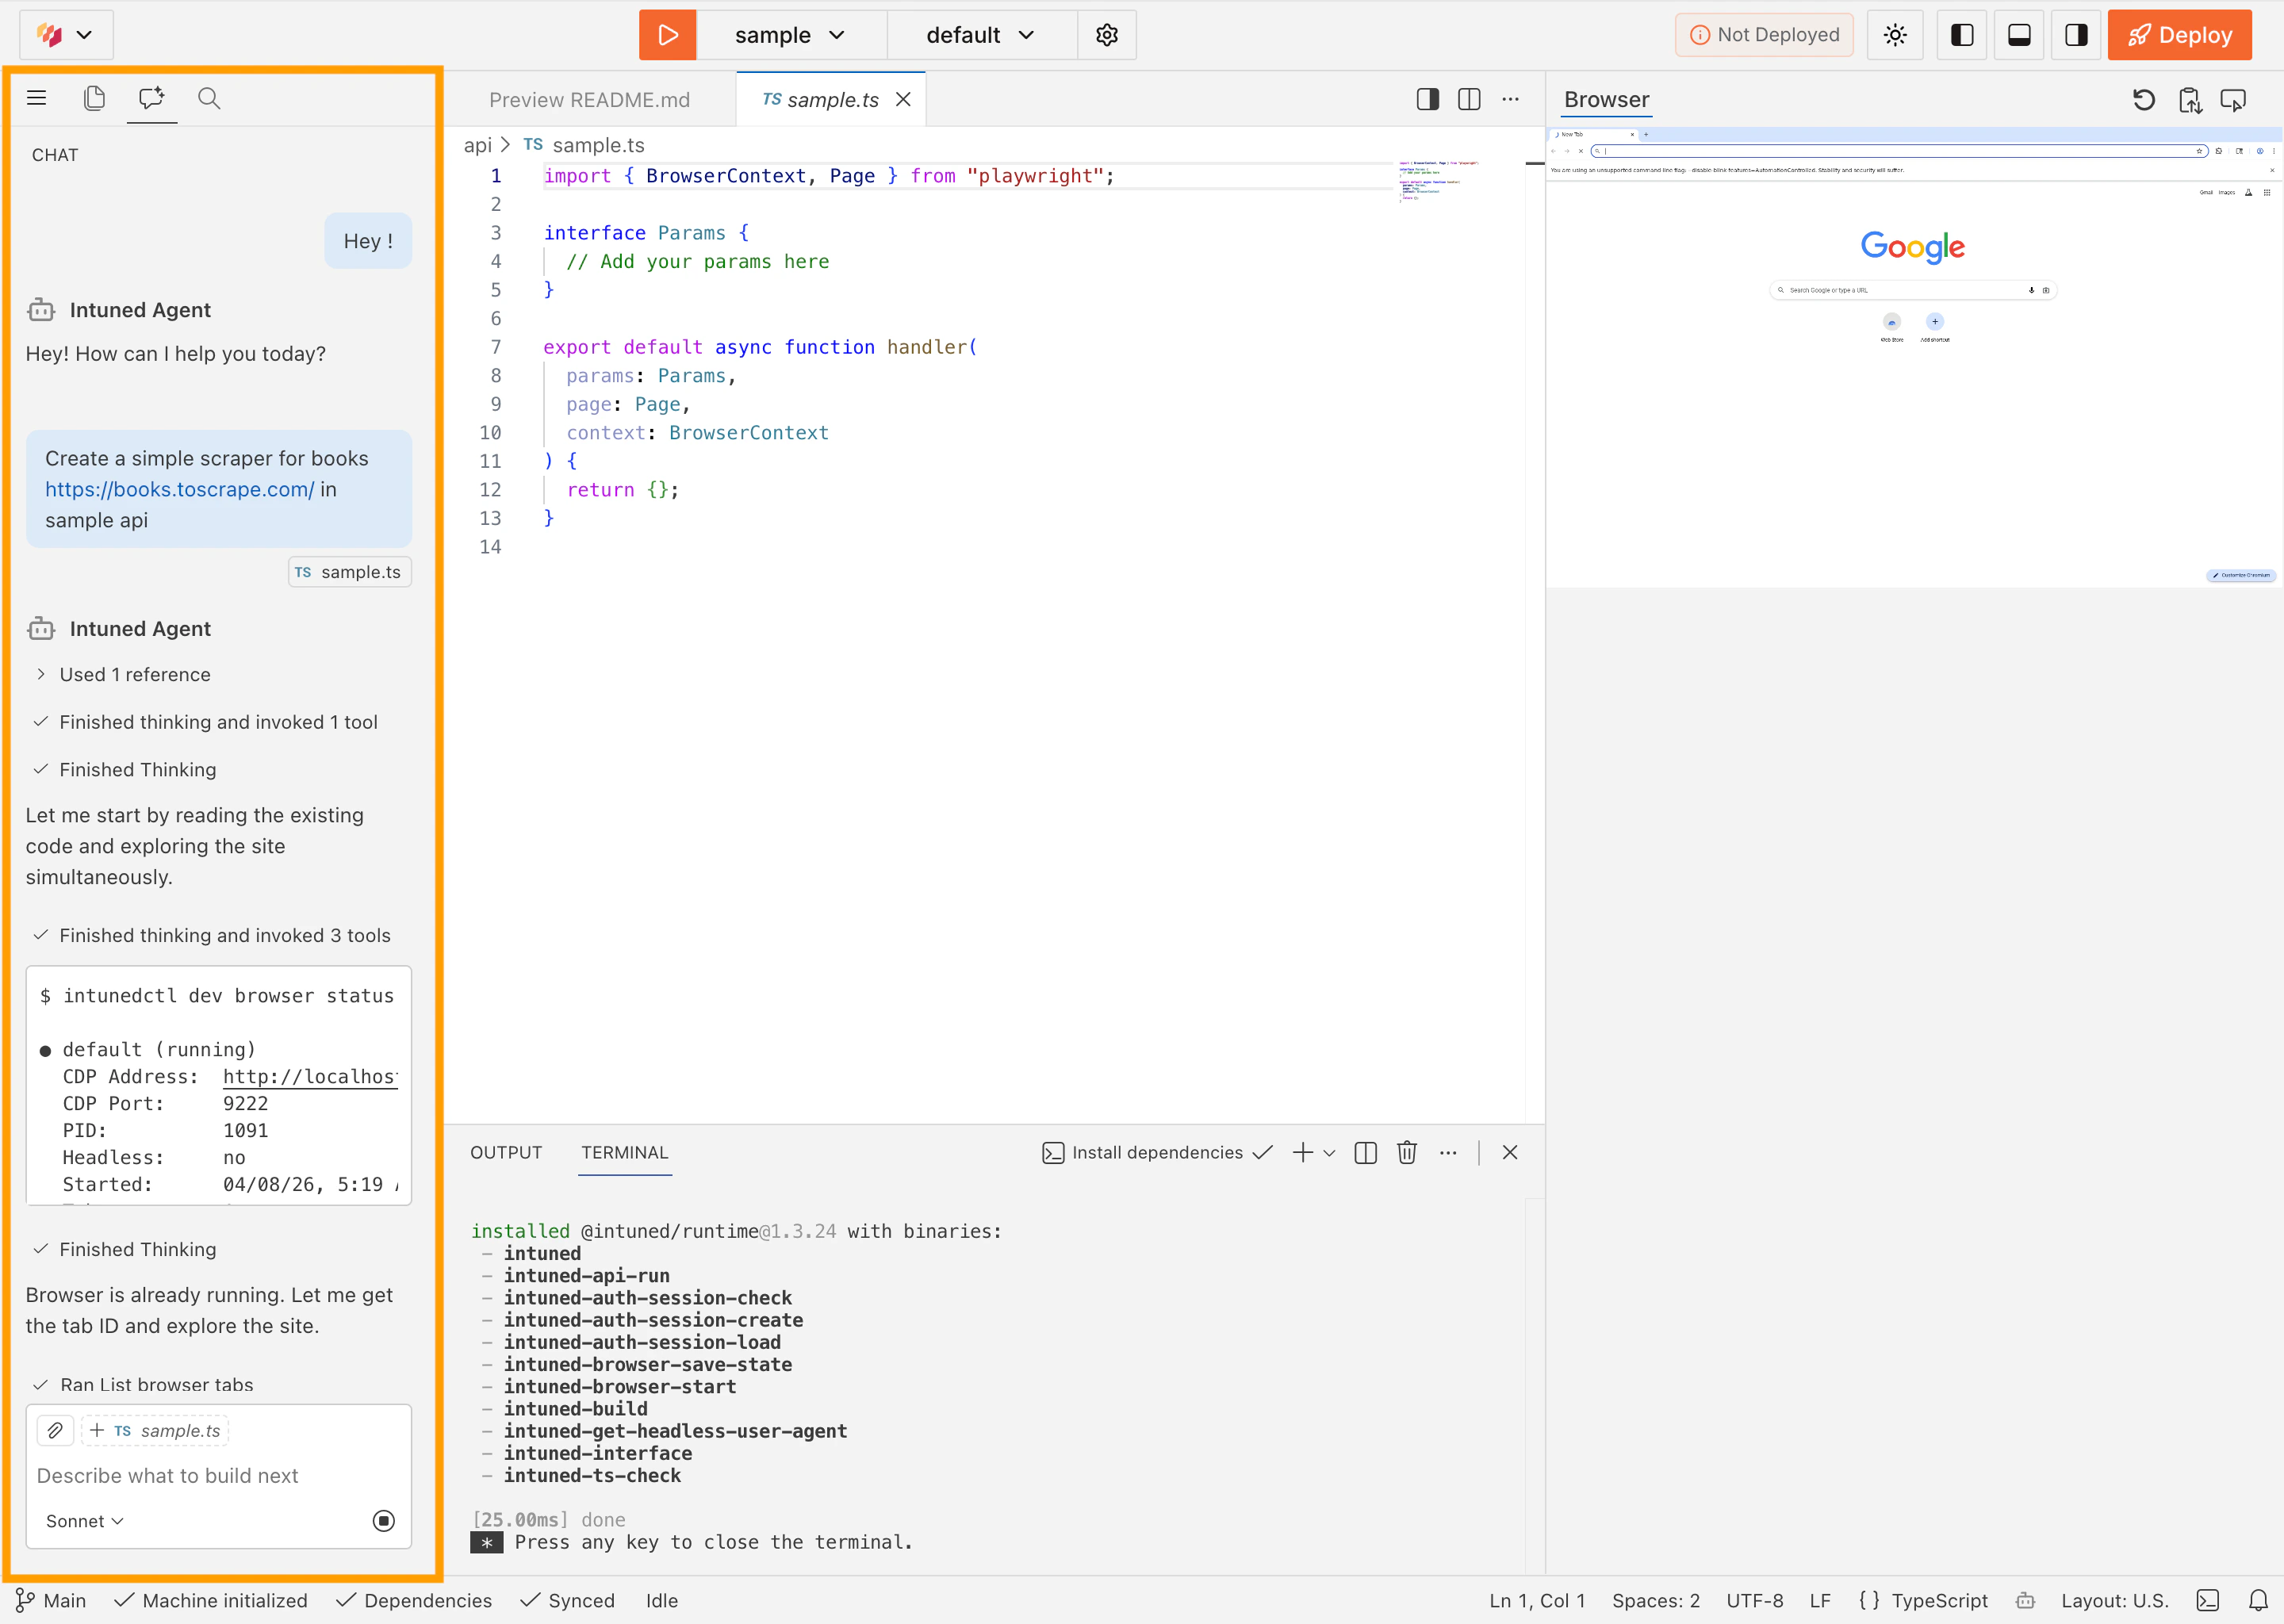
What it can do
- Answer browser automation questions in the context of your current project
- Edit the current project
- Generate selectors from live page context through Selector Agent
- Provide inline code suggestions while you type
Selector Agent
Selector Agent is the selector-focused part of the built-in AI in the online IDE for Hosted projects. It uses the live browser view and the current project context to generate code-ready selectors for the automation you’re building. To use Selector Agent, click the Selector Agent icon in the browser controls toolbar, then click the element you want to target on the live page. Selector Agent analyzes the page context and generates a reliable selector for your automation code.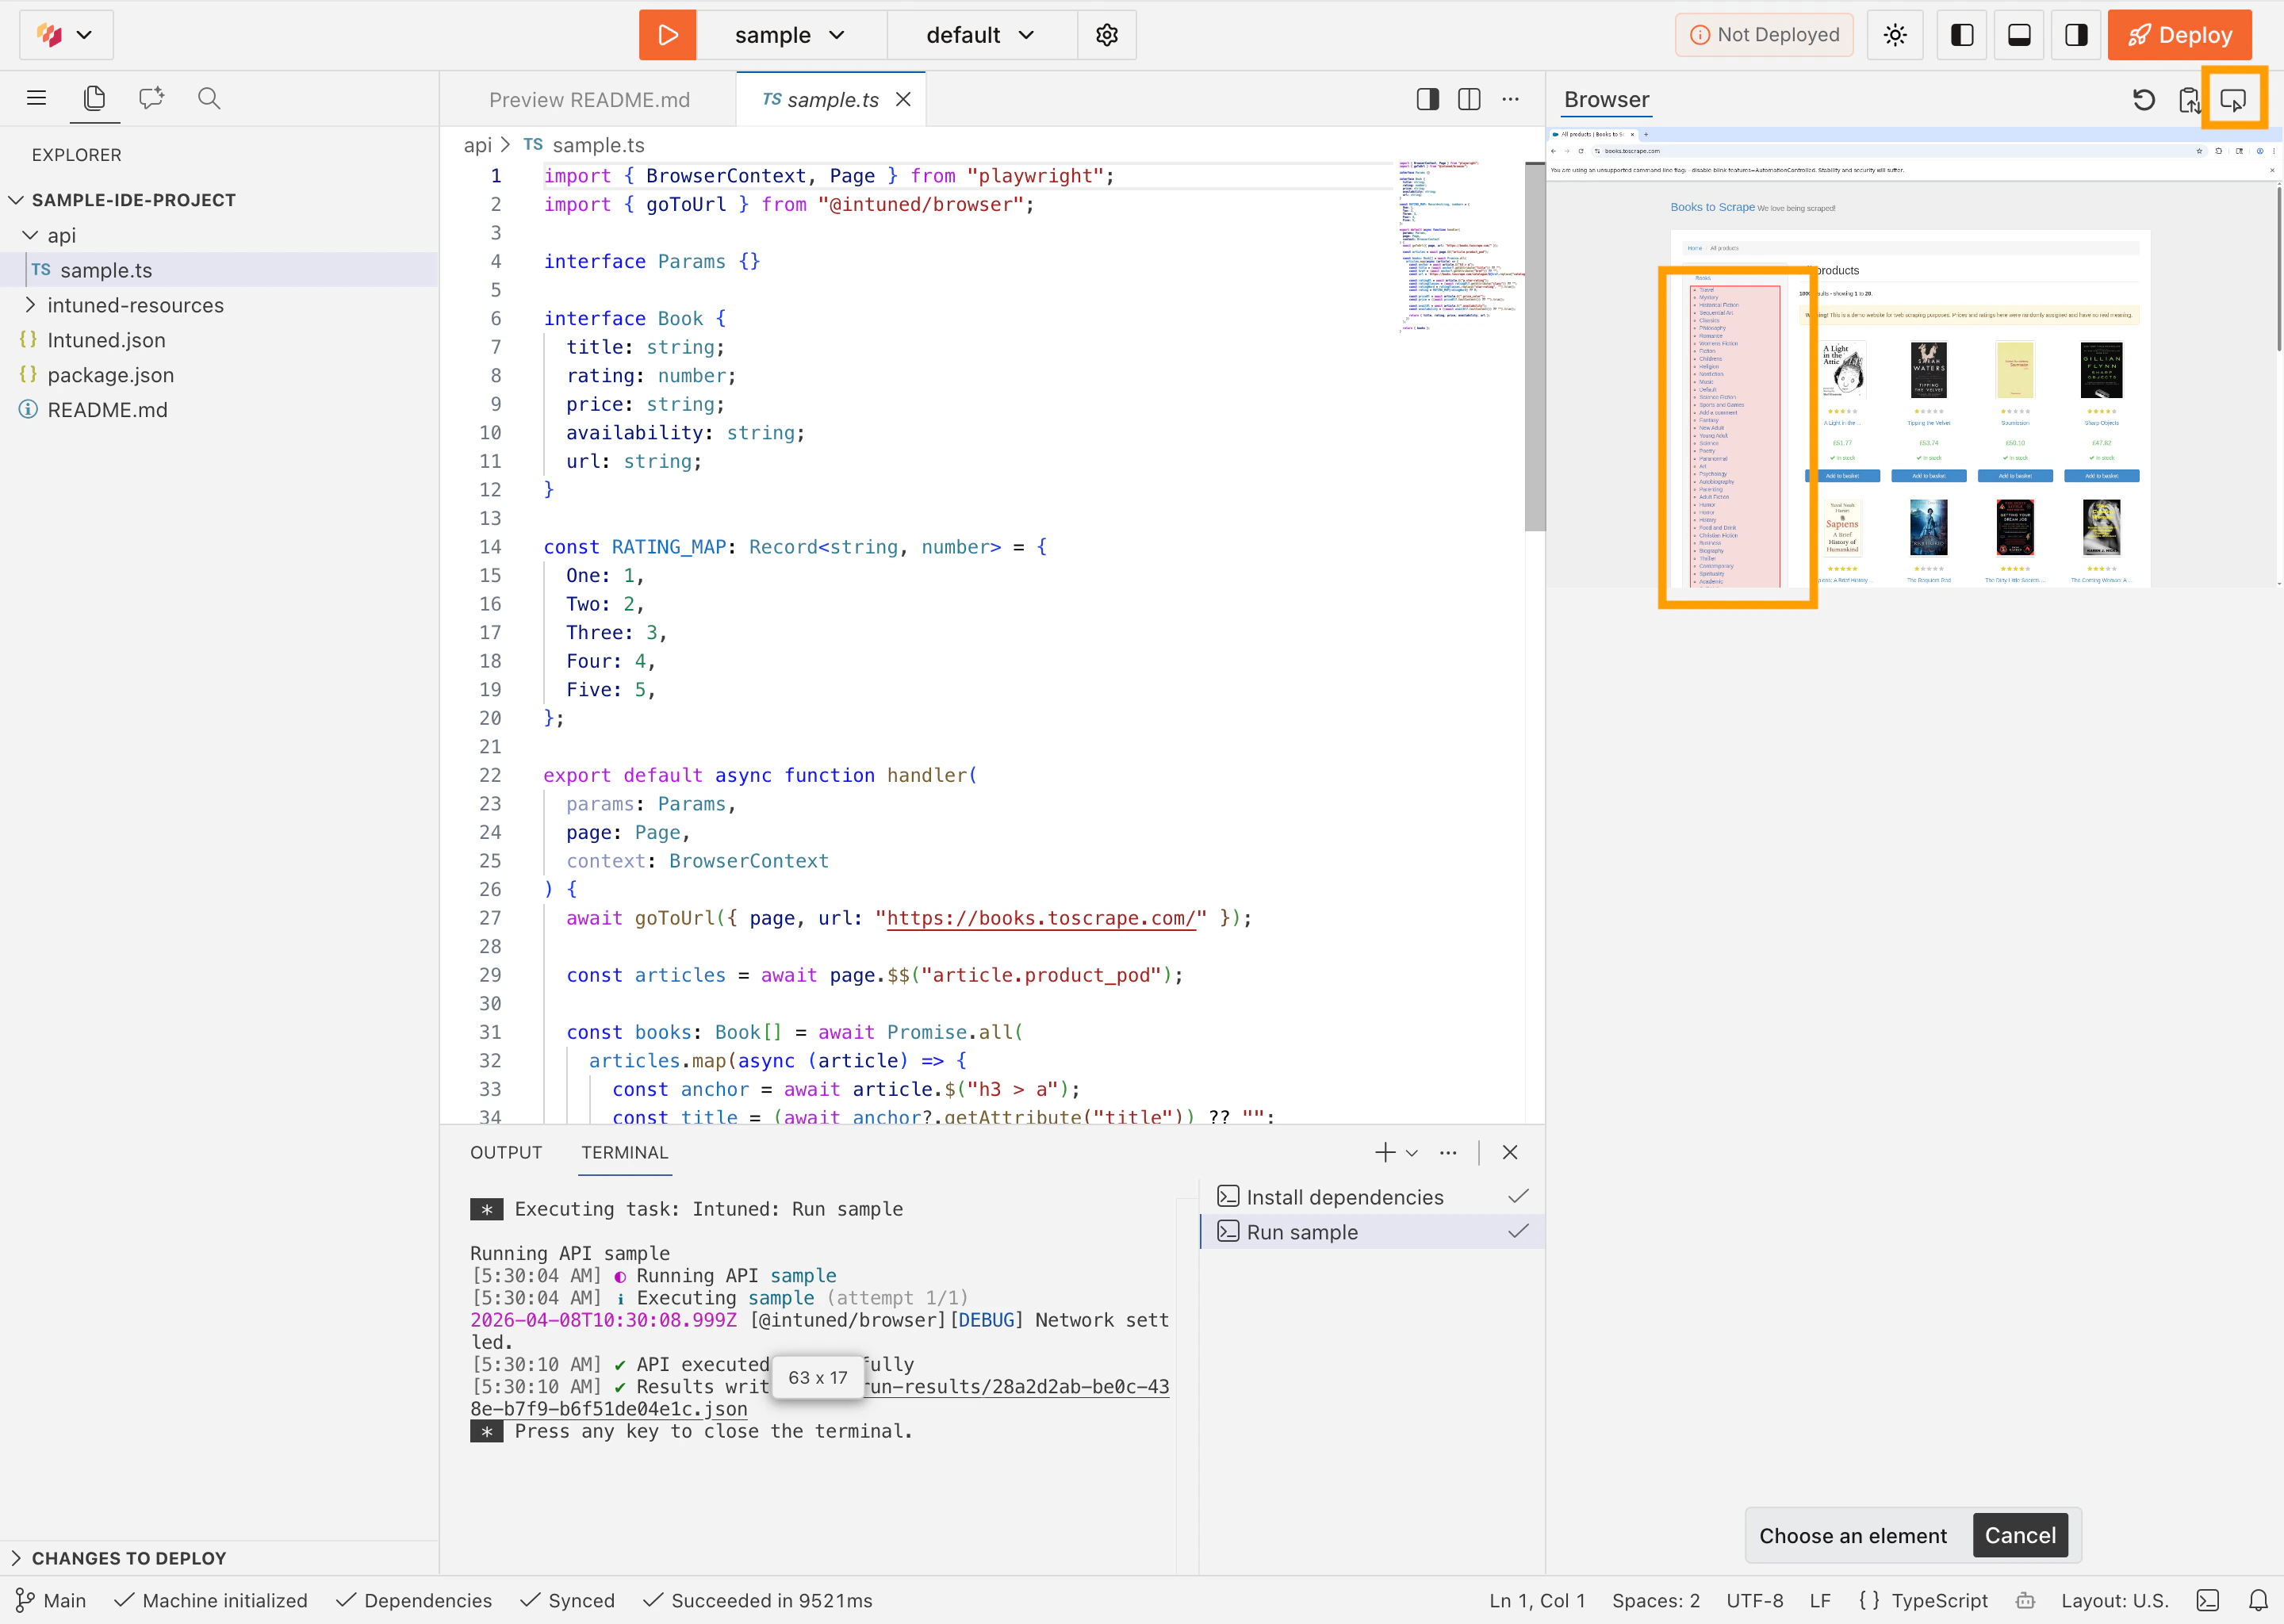
Availability and credits
Built-in AI in the online IDE is available only for Hosted projects. These features consume AI credits, so if credits are exhausted the AI tools in the editor are unavailable until credits are available again.Development workflow
APIs in theapi/ folder become callable endpoints when deployed. Build them by editing code manually or with the built-in AI tools, use Selector Agent when you need help targeting elements on the live page, then use the run controls to test any API with parameters before deploying. The browser panel shows your automation executing in real-time, so you can verify behavior visually and iterate quickly.
Draft vs deployed versions
When developing in the IDE, your project exists in two states:- Draft version: The code currently in your IDE editor (not yet live)
- Deployed version: The code running in production (available via API endpoints)
How deployment works
When you select Deploy, we build and validate your code, run health checks, and deploy if all checks pass. Only the deployed version is accessible via Standalone Run APIs and Jobs—draft changes don’t affect production until you deploy again.Branches and checkpoints
Your project’s shared draft is called Main. Intuned gives you two tools for managing change on top of it:- Branches are isolated copies of
Mainwhere work happens before merge. - Checkpoints are saved project states created automatically when Intuned persists important code changes.
Main directly.
Branches
Branches are part of the Intuned workflow for IDE projects. They are not Git branches.What branches are for
Use a branch when you want to:- keep work isolated from
Main - review a change set before merging it
- let the agent work on a project without editing the shared draft directly
- organize active work separately from completed work
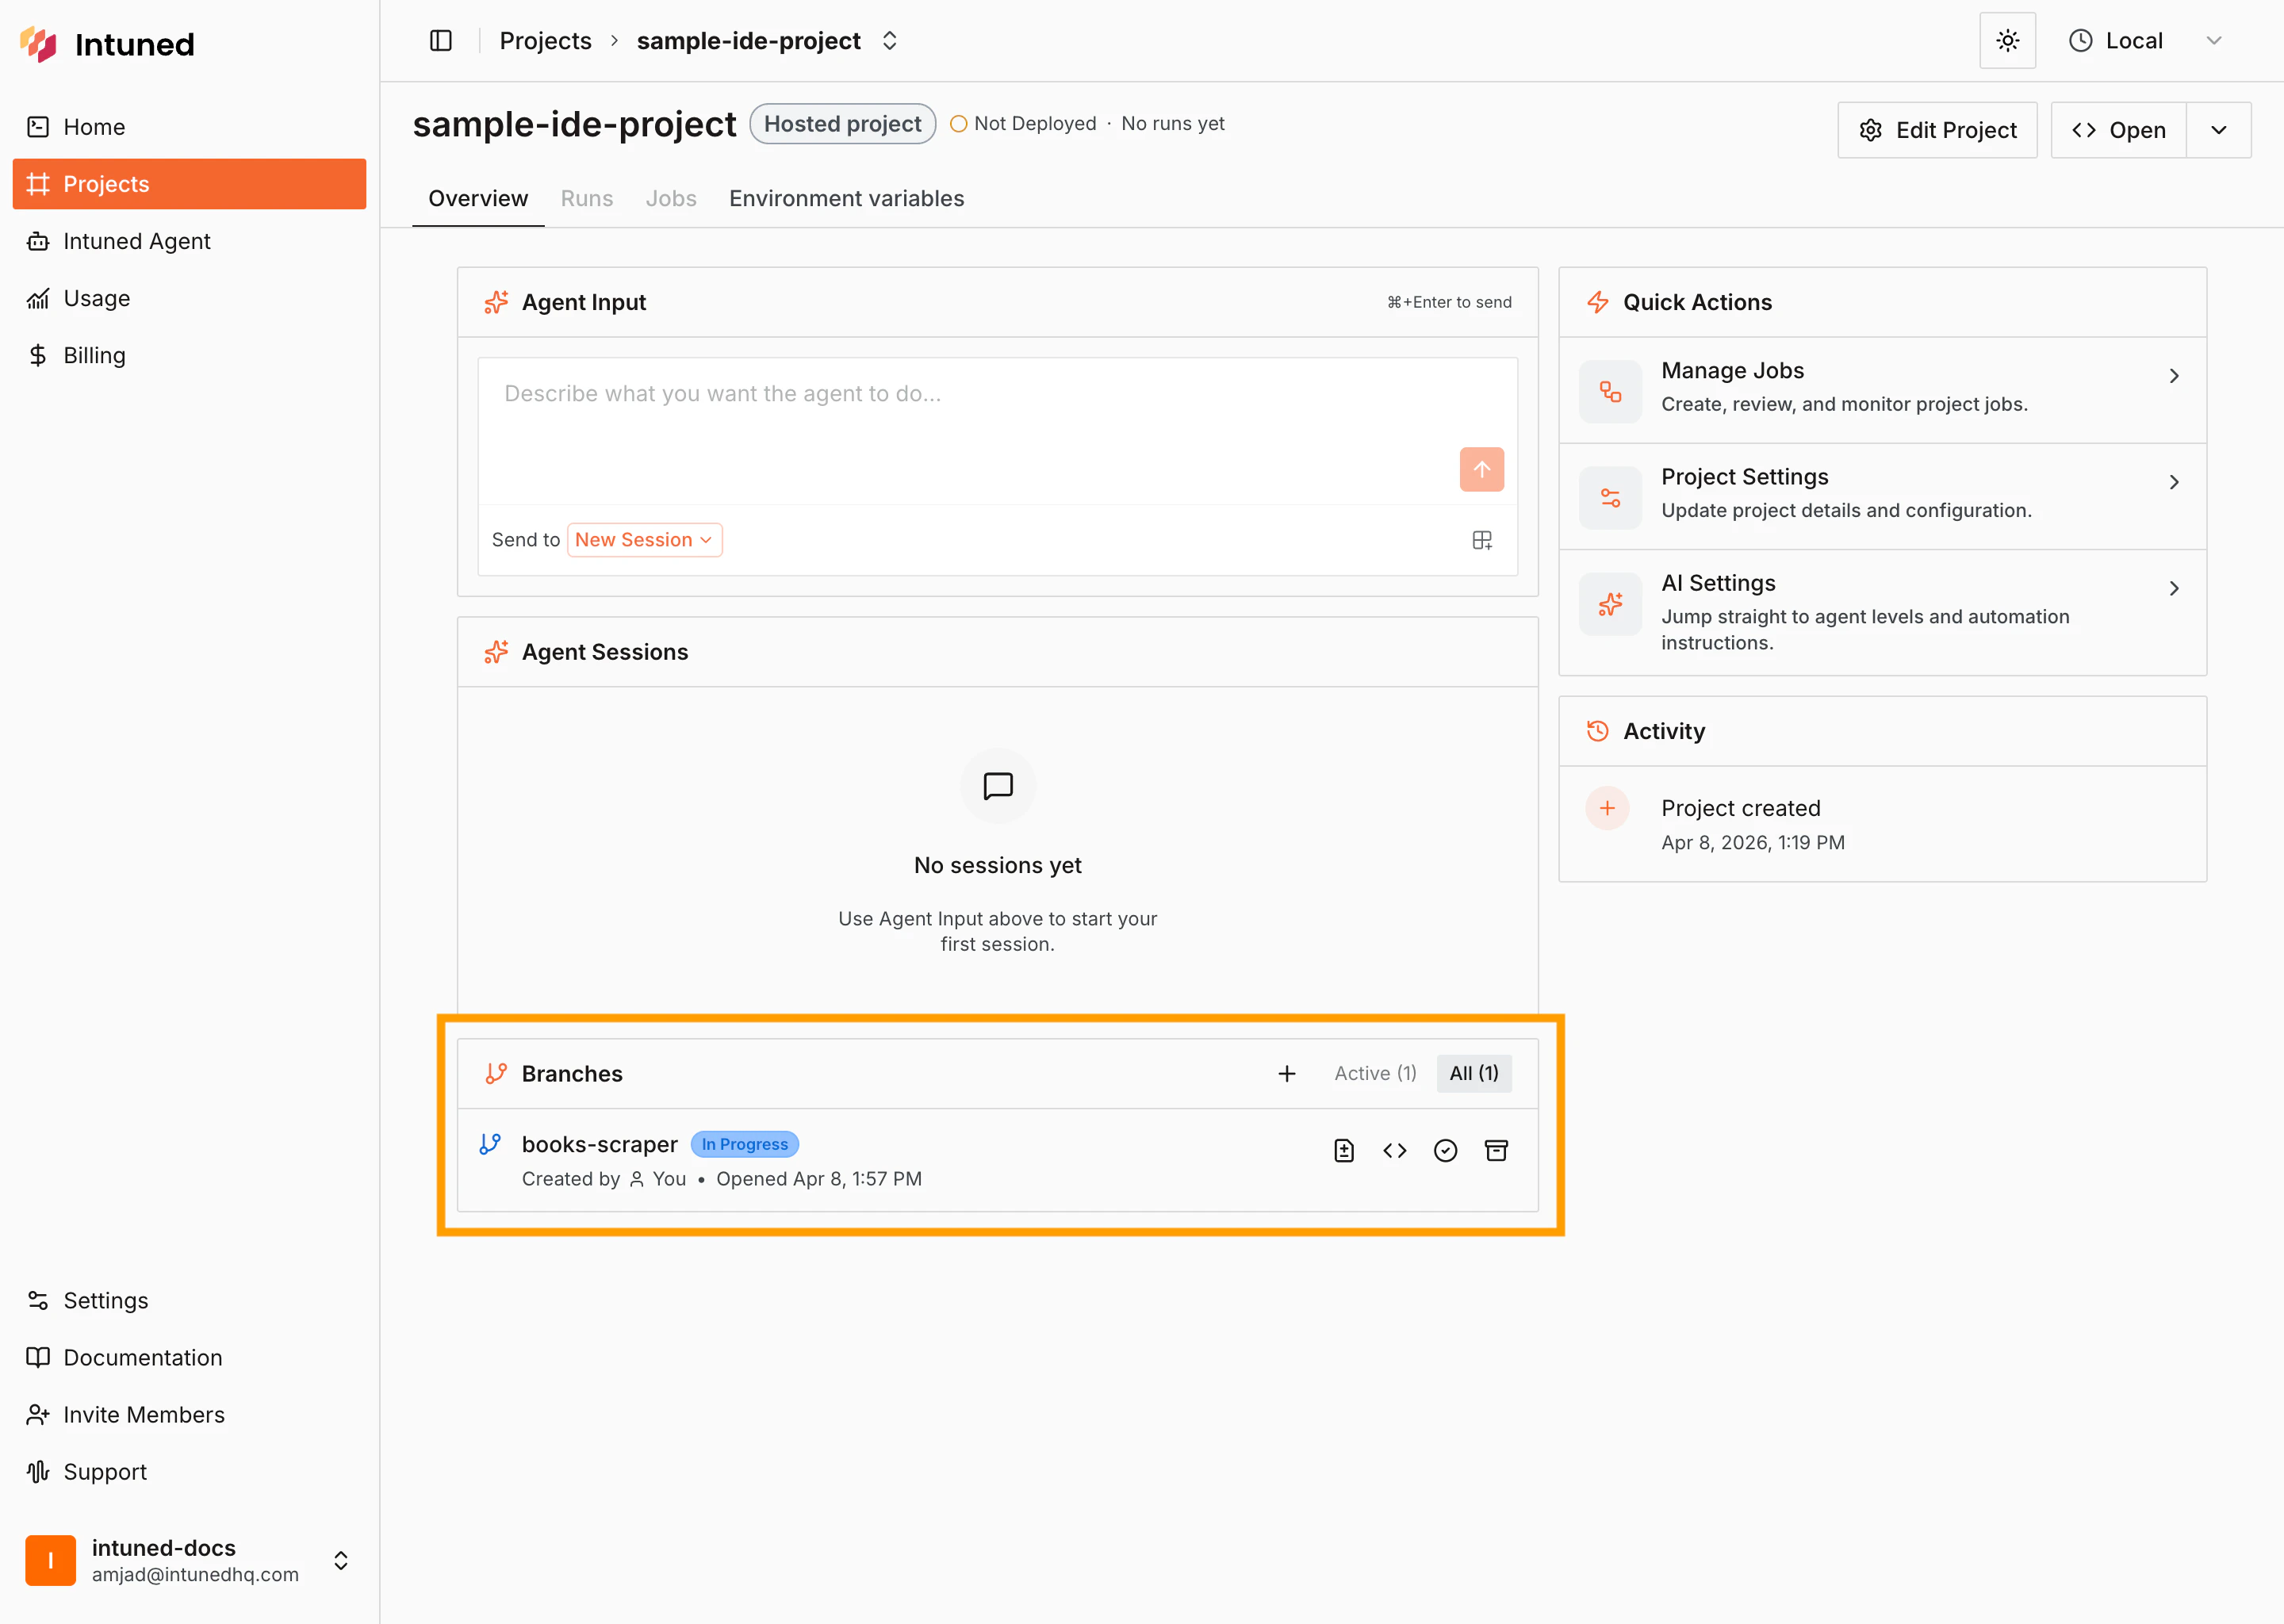
How to create a branch
Branches are managed from Project Home, the project overview page outside the editor.- Open the project in Project Home
- In the Branches panel, select Create Branch
- Enter a branch name
- Open the branch in the IDE
Main.
How to view a branch
You can view branches in two places:- Project Home shows the full list of branches, their status, and actions such as open, merge, and archive
- The IDE shows which branch you are currently editing
How to merge a branch
- Make the changes on the branch
- Mark the branch as Ready when the change set is ready for review
- Return to Project Home
- In the Branches panel, merge the branch back into
Main
Branch states
The Branches panel and the IDE use these states:
When the agent handles deployment, you may also see Auto-deployed as the user-facing label.
Agent-related branch badges
When the agent is involved, Project Home can show automation badges such as:- Auto-created
- Auto-merged
- Auto-deployed
Checkpoints
Checkpoints are created automatically when Intuned saves important project states. They are part of project history, not separate working spaces.Which checkpoints you will usually see
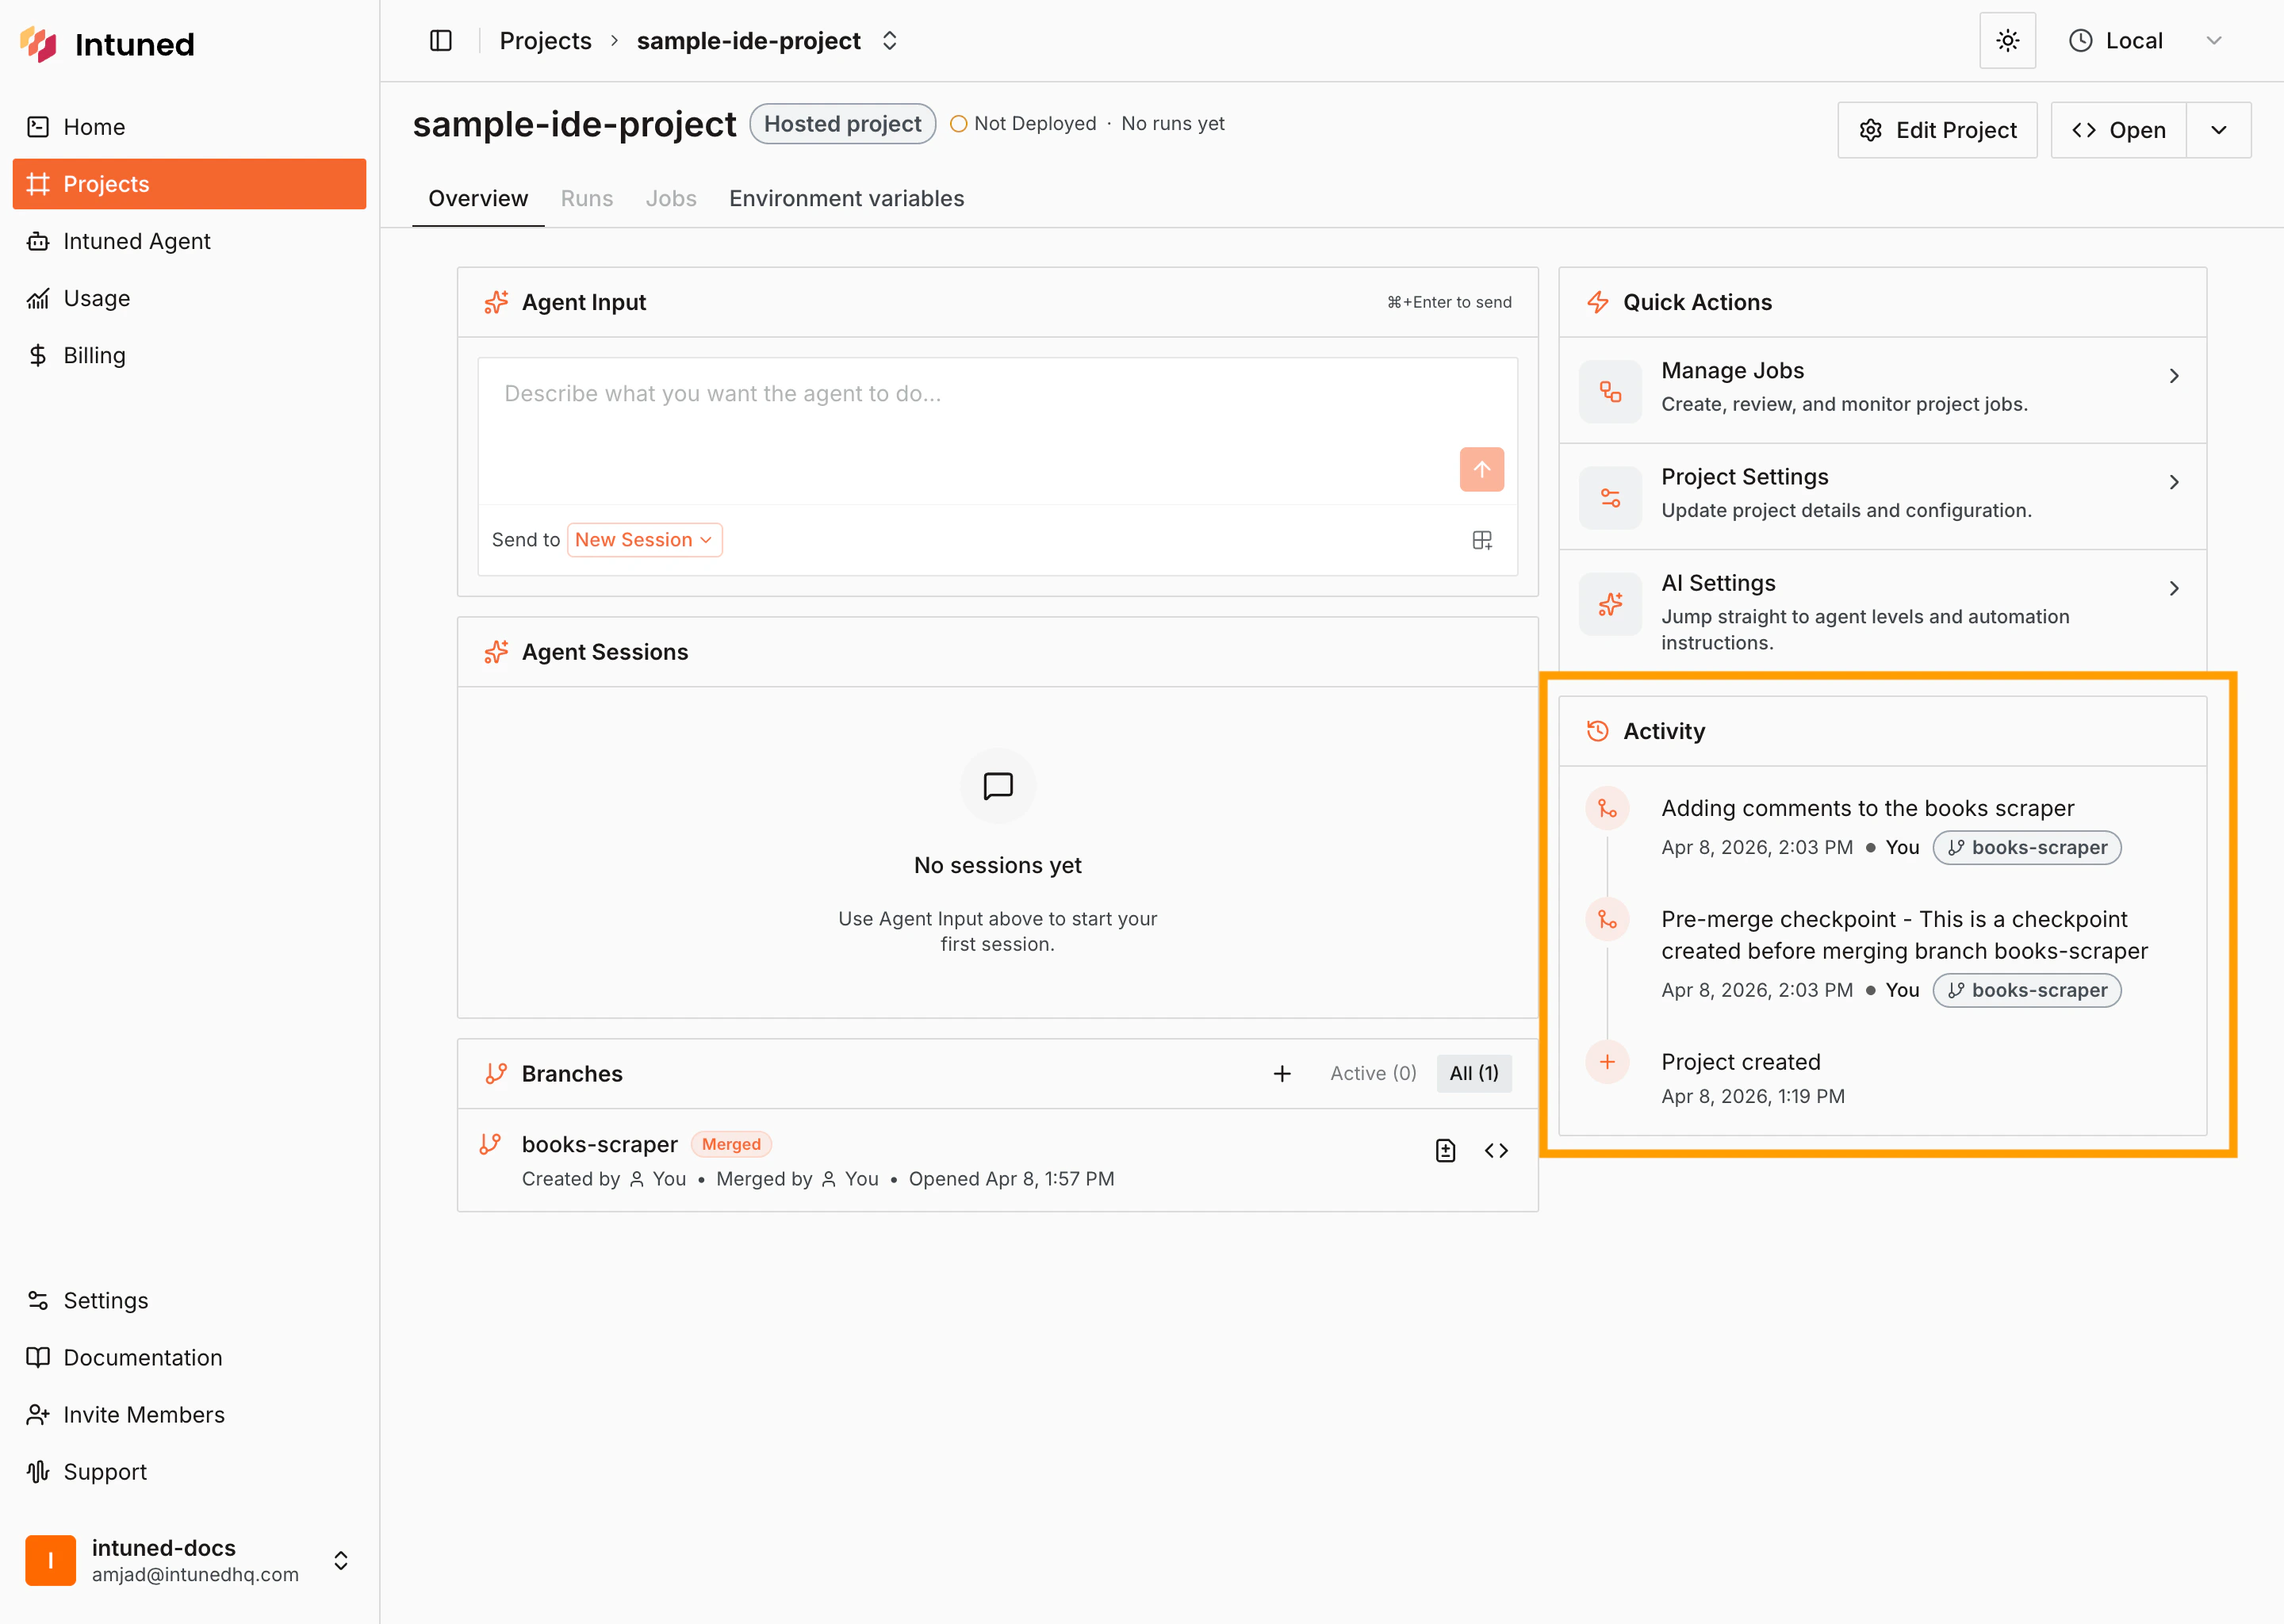
You do not create checkpoints manually in the current workflow described here. Intuned creates them automatically when important project states are saved. Checkpoint-related activity entries can appear in different forms depending on what was saved. Common examples include:- descriptive notes attached to a saved change, such as Adding comments to the books scraper
- automatic Pre-merge checkpoint entries created before a branch is merged into
Main - Merged branch or Deployed to production entries when a merge or deployment is saved without a more specific note
How to view checkpoints
Open Project Home and check the Activity panel. This is where checkpoint-related history appears. The Activity panel shows:- what happened
- who or what triggered it
- when the code was saved
Checkpoints in the current product are viewed through project history in the
Activity panel. They are not a replacement for Git history or a standalone
checkpoint manager.
Work with AuthSessions
For projects that require authentication (logging into websites before automation or persisting browser sessions between runs), you can enable AuthSessions in your Hosted project. See AuthSessions for details.Enabling AuthSessions
- Open
Intuned.jsonin your project - Set
"authSessions": truein the configuration
auth-sessions/create- Handles the login/authentication processauth-sessions/check- Validates if the session is still valid
Testing authenticated APIs
Before running APIs that require authentication:- Create an AuthSession by running
auth-sessions/create - Run your API - it will now use the newly created AuthSession
- If you have multiple AuthSessions, select which one to use from the dropdown in the top toolbar
- Credentials-based: Use
auth-sessions/createto create and save a browser session - Recorder-based: Record yourself logging in via the browser panel, then save the session when done
Deploy your project
When you’re ready to make your automation available as a live API:- Select Deploy in the top-right toolbar
- Watch the live deployment logs as your project is built and deployed
- Wait for “Ready” status indicating successful deployment
If deployment fails, the IDE will show error logs. Fix the issues in your code
and try deploying again. Your previous deployed version remains active until a
successful deployment completes.
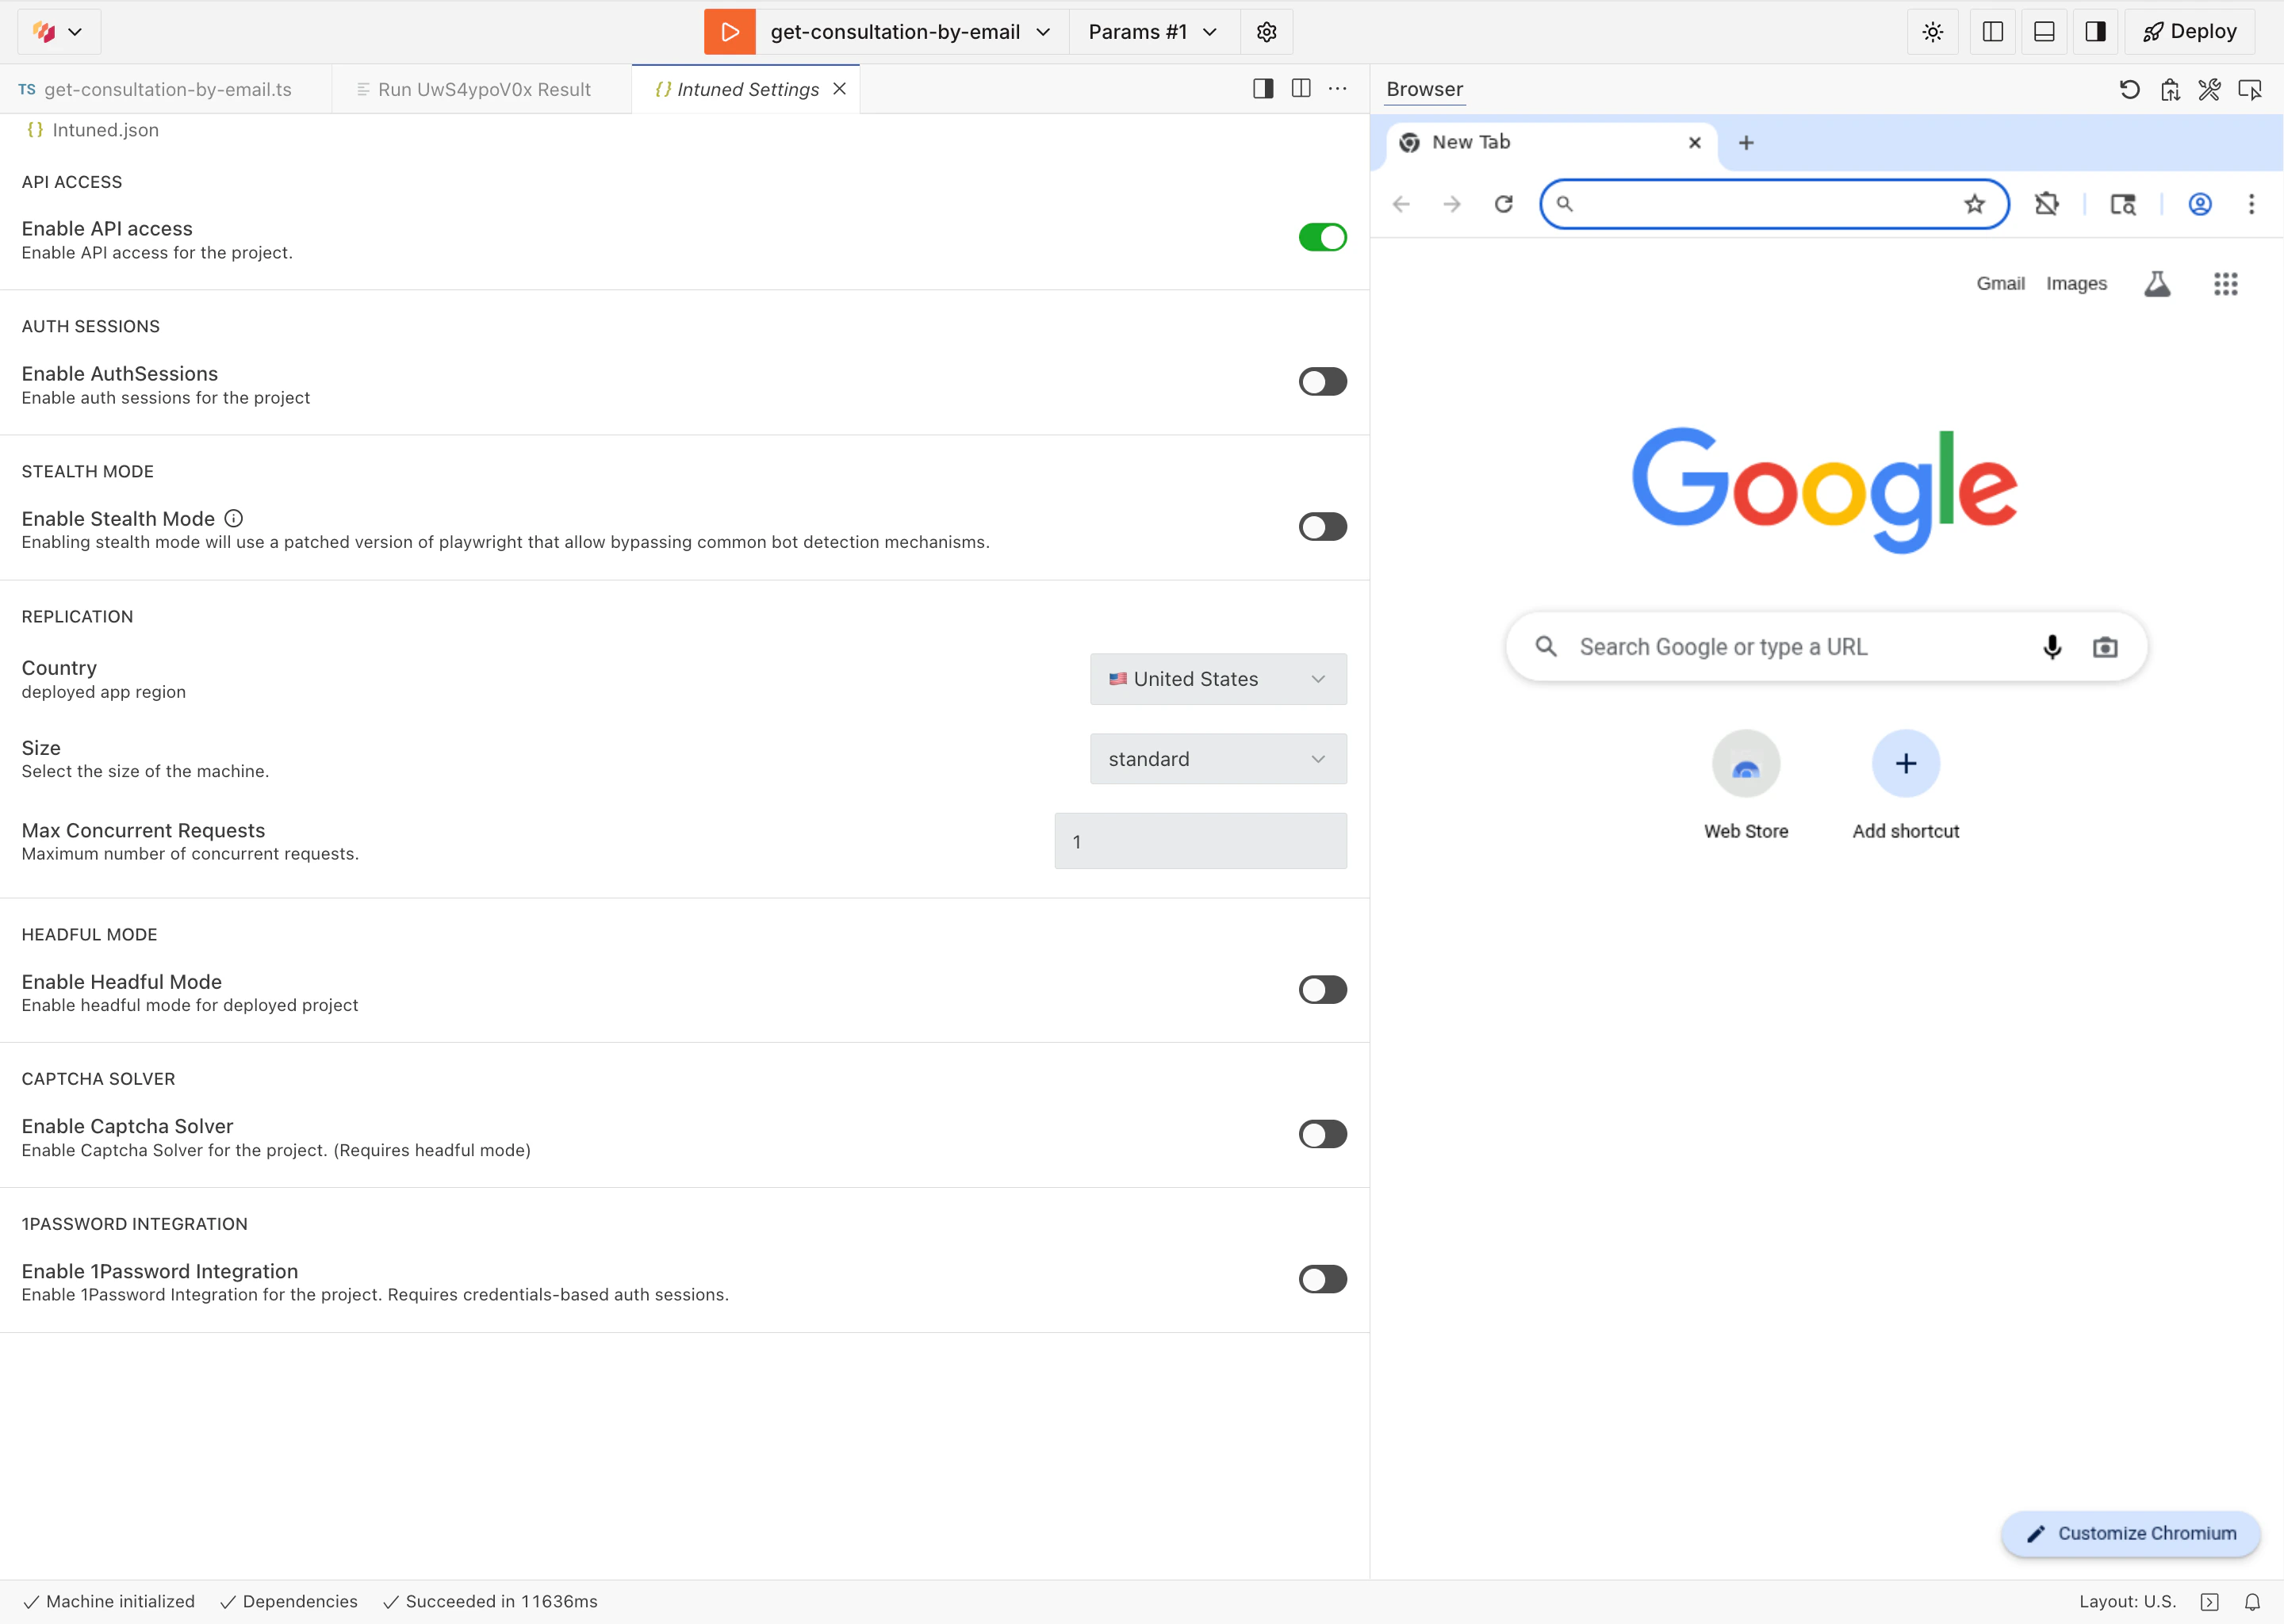
Intuned settings file (Intuned.json)
Hosted projects useIntuned.json for configuration, but unlike Connected projects, which use the local CLI, you have a controlled UI in the online IDE to modify settings. Open Intuned.json in the file explorer to view and edit settings.
See the Intuned settings file for details on each configuration value.
Best practices
Test thoroughly before deploying
Test thoroughly before deploying
Always run your APIs multiple times in the IDE with different parameters to ensure they work correctly. Use the real-time browser view to catch issues early.
Use AuthSessions for authenticated workflows
Use AuthSessions for authenticated workflows
If your automation requires logging in, enable AuthSessions and test the
authentication flow in the IDE before deployment. Ensure
auth-sessions/check
passes consistently and is performant.Leverage the Intuned Agent
Leverage the Intuned Agent
Use Intuned Agent to create and edit Hosted projects through natural language. For Connected projects, run the same agent locally with the External agent plugin.
Limitations
No Git integration: The IDE doesn’t integrate with Git, but you have full versioning and deployment history built in. For Git workflows, use the Local CLI. Single developer only: Multiple people cannot make edits on the same Hosted project simultaneously. No local IDE choice: You must use Intuned’s web-based editor. If you prefer VS Code, JetBrains, or other IDEs, use the CLI approach. AI in the IDE is available only for Hosted projects: Selector Agent and the rest of the built-in AI tools are not available in Connected projects.FAQs
Can I convert a Hosted project to Connected or vice versa?
Can I convert a Hosted project to Connected or vice versa?
Not directly. Hosted and Connected projects have different structures. You’ll need to create a new project of the desired type and copy your code manually.
What happens to my draft if I don't deploy?
What happens to my draft if I don't deploy?
Your draft remains in the IDE. The deployed version continues running
unchanged. You can keep drafts indefinitely without deploying.
Can I use the built-in AI tools or Selector Agent in Connected projects?
Can I use the built-in AI tools or Selector Agent in Connected projects?
The built-in AI tools and Selector Agent are available only in Hosted
projects. For Connected projects, you can run the Intuned Agent itself locally
with the External agent plugin, and
use your own editor, Git workflow, and other AI tools.
When to use Hosted projects vs Connected projects
Related resources
Local development CLI
Develop locally with your own IDE and Git workflow
Intuned Agent
AI agent that builds and maintains browser automations
AuthSessions
Build authenticated automations
How the platform works
Understand Intuned’s architecture and execution model